
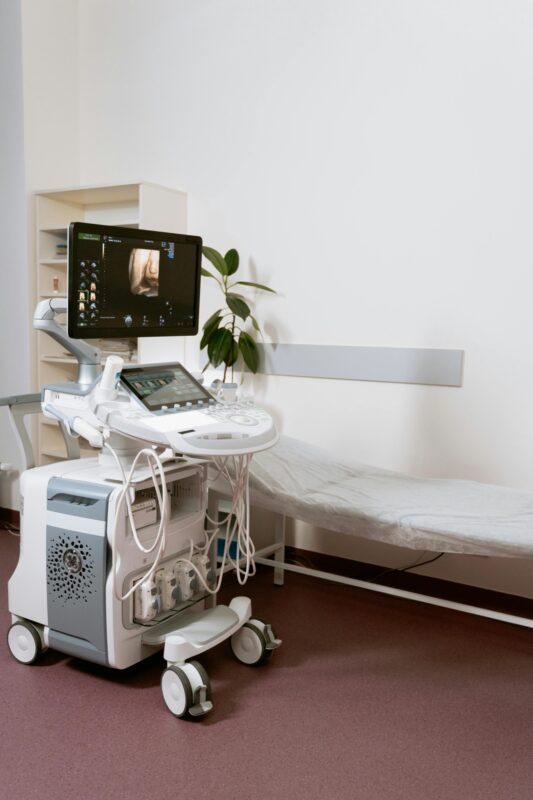
Troubleshooting Blurry 4D Images: A Step-by-Step Workshop
Nothing deflates client excitement faster than a blurry 4D keepsake scan. Yet even seasoned sonographers encounter fuzzy volumes on occasion. In this workshop-style guide, we’ll walk through every tweak—from gain maps to frequency shifts—to rescue problem scans and deliver crystal-clear images that delight parents. Grab your probe and let’s get hands-on!
Understanding the Roots of Blurry 4D Scans
Before adjusting any knob, it’s crucial to diagnose why your 4D volume appears soft or smeared. Common culprits include improper gain settings, excessive depth, suboptimal frequency, and even simple motion artifacts. By systematically isolating each variable, you’ll save valuable scan time and reduce repeat visits.
Imagine a client returning weeks later disappointed—lost revenue for your elective ultrasound business and frustration all around. A clear troubleshooting workflow not only improves image quality but also elevates your studio’s reputation. Ultrasound Trainers embeds these diagnostic steps into its 4D ultrasound training curriculum, ensuring every operator masters rapid problem-solving.
In this section, we’ll cover four core factors that influence volumetric clarity: gain/TGC balance, depth and focus zones, transducer frequency, and sweep stability. Understanding their interplay is the first workshop exercise—think of it as the trouble-shooting checklist you reference before every scan.
Ready to dive in? Let’s start by mapping out our first variable: gain and time-gain compensation (TGC).
Workshop Exercise: Gain and TGC Mapping
Begin with a baseline B-mode image of your phantom or volunteer. Push overall gain until the image histogram centers around mid-grey—too low and you lose detail; too high and you flatten contrast. Record your starting gain value for reference.
Next, adjust the TGC sliders. Aim for a gentle ascending curve that delivers equal brightness from near field to the target depth. Avoid abrupt jumps; they cause banding in 4D volumes. Ultrafine finger movements on the sliders help you see real-time changes.
Once you’ve locked in gain and TGC, capture a short 4D sweep. Compare the volume to your warm-up scan. Notice improvements in edge definition and speckle reduction? If not, revisit gain/TGC before proceeding. This iterative mapping is the cornerstone of any ultrasound franchise’s quality assurance protocol.
Optimizing Depth and Focus Zones
Depth settings determine how much tissue the beam penetrates—and directly impact frame rate. Excessive depth dilutes resolution by stretching your pixel matrix over too large a field. Too shallow, and you clip anatomy. Our goal: set depth just beyond the structure of interest.
Focus zones (focal points) sharpen specific layers. Placing a single focus at the mid-anatomical plane tightens lateral resolution. Multiple foci can enhance multi-plane clarity, but each added zone reduces sweep speed and may introduce temporal artifacts.
In this workshop step, you’ll create two presets: one for shallow fetal face renders and another for deeper limb or spine views. Saving these presets speeds up your elective ultrasound training workflows and ensures consistency across operators.
Test each preset with quick phantom scans. Compare volume edge sharpness and smoothness. The ideal depth/focus combo yields crisp 3D surfaces without motion stutter—a balance every high-end 4D ultrasound machine user strives for.
Sub-Workshop: Depth-Sweep Balance Test
Perform back-to-back 4D sweeps at three depth increments: standard, +1cm, and –1cm. Note the frame rate displayed on-screen—higher rates correlate with smoother volumes. Evaluate which depth delivers the best mix of detail and smooth playback.
Record your findings in a simple table (e.g., depth, frame rate, edge clarity). Sharing this data in team meetings reinforces best practices and empowers newer sonographers with concrete benchmarks.
Finally, integrate your chosen depth/focus presets into your machine’s user profiles. This workshop exercise transforms into a living SOP that underpins your studio’s quality standards.
Tuning Transducer Frequency and Bandwidth
Higher-frequency probes deliver finer resolution but sacrifice penetration. Lower frequencies penetrate deeper but render fuzzier images. Many 4D probes offer adjustable bandwidth—a sweet spot between these extremes.
Begin by selecting the highest frequency that still reaches your structure of interest. If you’re scanning the fetal face at 12–18 weeks, a 5–7 MHz band often provides optimal detail. For later gestations, drop to 3–5 MHz to maintain penetration through thicker tissues.
Workshop directive: perform paired sweeps at two frequency settings, keeping all other parameters constant. Compare contrast resolution and noise levels. Which bandwidth yields superior surface definition? Document your results.
These frequency-tuning habits underpin advanced 3D ultrasound training modules—Ultrasound Trainers emphasizes hands-on frequency drills to build operator intuition for real-world scanning challenges.
Hands-On: Bandwidth Comparison Drill
Mark your scan sequence: sweep #1 at high frequency, sweep #2 at low frequency. Label each volume immediately after acquisition. During group review, highlight differences in texture smoothness and noise artifacts.
Encourage trainees to rate each volume on a 1–5 clarity scale. Aggregating these subjective scores alongside objective frame-rate data uncovers nuanced trade-offs that raw specs can’t capture.
This drill cements the principle that “one size does not fit all”—frequency choices must adapt to patient habitus and diagnostic goals.
Stabilizing Your 4D Sweep Technique
Even flawless machine settings can’t overcome shaky hands or inconsistent sweeps. Motion artifacts remain a leading cause of blur. In this section, we’ll refine your physical technique to guarantee smooth, repeatable sweeps every time.
Adopt a slight wrist pivot rather than full arm movement; it allows micro-control over sweep speed and angle. Imagine your probe gliding over a sheet of glass—steady, even pressure equals uniform data capture.
Workshop challenge: use a metronome or onboard timer to pace your sweep—aim for a 6–8 second sweep per standard 60° volume. Practice on phantoms until your muscle memory locks in consistent timing.
Including these motion drills in your studio’s ultrasound business training program reduces scan variability—happy clients and streamlined workflows follow.
Drill: Timed Sweep Calibration
Set your timer to beep every 7 seconds. Perform a sweep in sync with the beep, then immediately pause and record the frame rate and image smoothness. Repeat ten times, aiming for identical results.
Create a “sweep consistency score” by counting adequate versus flawed volumes. Track your progress—most operators see a 50% improvement in consistency within a single workshop session.
Integrate a quick sweep-calibration check into your daily warm-up routine. It’s a five-minute investment that translates to fewer spoiled scans and higher client satisfaction.
Final Quality Assurance and Client Presentation
With optimized settings and stabilized technique, it’s time for your final QA check. Review each 4D volume for edge crispness, smooth frame transitions, and artifact absence. Use freeze-frame and cine-loop playback to confirm uniform quality.
Before showing images to clients, apply post-processing tweaks: adjust brightness/contrast sparingly, and apply mild speckle reduction filters only if needed. Over-filtering can erase fine detail.
Prepare backup stills and short clip loops for client galleries. Having redundant files ensures you never disappoint if one volume underperforms.
Ultrasound Trainers recommends running a five-point QA checklist before closing each session—this systematic approach reinforces your reputation for consistent, high-quality keepsake scans.
Checklist: Pre-Client QA Review
✔ Confirm gain/TGC balance using previously recorded baseline values.
✔ Verify depth and focus presets match chosen anatomical view.
✔ Ensure frequency choice delivers both penetration and resolution.
✔ Validate sweep consistency score meets studio standards.
✔ Apply minimal post-processing and prepare presentation files.
Conclusion and Next Steps
Blurry 4D volumes don’t have to derail your elective ultrasound workflow. By following this hands-on workshop—mapping gain, mastering depth, tuning frequency, stabilizing sweeps, and enforcing QA—you’ll consistently deliver crystal-clear images that exceed client expectations.
Document your findings, refine your SOPs, and incorporate these drills into your ongoing 3D/4D ultrasound training regimen. The next time you face a fuzzy scan, you’ll have a proven roadmap to rescue it.
Ready to elevate your studio’s image quality? Share your workshop insights below, or contact Ultrasound Trainers for customized on-site training that keeps your team at the cutting edge.
Which workshop step will you implement first? Let us know in the comments and tag a colleague who could benefit!

What Most New Elective Ultrasound Operators Get Wrong Before They Open
The most common mistakes new elective ultrasound studio owners make before opening -- from equipment[...]

How to Start an Elective Ultrasound Business in Minneapolis
Thinking about starting an elective ultrasound business in Minneapolis? This practical guide covers training, equipment,[...]

How Elective Ultrasound Studios in Wichita Build a Consistent Booking Pipeline
Marketing an elective ultrasound studio in Wichita, Kansas? This guide covers local SEO, social strategy,[...]

Elective Ultrasound Training in Hawaii: What You Need to Know Before You Enroll
Considering elective ultrasound training in Hawaii? Learn what programs cover, what the island market demands,[...]

Elective Ultrasound Training and Studio Opportunities in Washington State
Elective ultrasound training in Washington State is within reach. Explore startup opportunities, equipment needs, and[...]

On-Site Elective Ultrasound Training at Your Location: What to Expect and How to Prepare
A complete guide to on-site elective ultrasound training at your location covering curriculum, space preparation[...]

Elective Ultrasound Equipment for Minnesota Startup Studios
Building a keepsake ultrasound studio in Minnesota? This guide covers how to evaluate elective ultrasound[...]

How 3D/4D Ultrasound Technology Has Evolved: From VHS Tapes to HD Live and Beyond
Explore how 3D/4D ultrasound technology evolved from early static 3D volumes through real-time 4D, HD[...]

ARDMS, ARRT, and Non-Diagnostic Credentials: What Elective Ultrasound Studio Owners Actually Need
The ARDMS vs non-diagnostic credential elective ultrasound question confuses aspiring studio owners. This plain-language comparison[...]

Elective Ultrasound Training in France: Regulations, Market Opportunity, and Getting Started
Considering elective ultrasound training France? This guide covers the regulatory landscape, market opportunity in Paris[...]

Networking Strategies for Elective Ultrasound Studio Owners: Associations, Events, and Professional Communities
Networking as an elective ultrasound studio owner builds the peer relationships, referral channels, and operational[...]

How to Open a Keepsake Ultrasound Studio in Huntington, West Virginia
Planning to open a keepsake ultrasound studio in Huntington, West Virginia? This guide covers the[...]