

Your ultrasound studio demo reel video is the single most powerful marketing asset your business can own – and most studio owners either skip it entirely or produce something that undersells everything they have built. A sixty-second reel on Instagram or pinned to your Google Business Profile does more conversion work than a week of static posts. It shows prospective clients the environment they will walk into, the warmth of the experience, and the quality of the imagery they can expect. Done right, it answers every unspoken question before someone picks up the phone.
This guide covers the planning, production, and distribution of a professional demo reel – including what to shoot, how to script or structure it without making it feel scripted, the technical basics you need to know, and the platforms where it will do the most work for your studio.
An ultrasound studio demo reel video is a short (typically sixty to ninety seconds) marketing video that showcases your studio environment, scan quality, and client experience. The most effective reels blend genuine emotional moments with clear visual quality, are optimized for vertical mobile viewing, and are distributed across social media, your website, and your Google Business Profile. Last Updated: June 2026
Why the Ultrasound Studio Demo Reel Video Is Your Highest-ROI Marketing Asset
An ultrasound studio demo reel video is a professionally produced short-form video that communicates your studio’s environment, image quality, and client experience in under ninety seconds. It is typically the first thing prospective clients want to see before booking, and it does more conversion work per dollar spent than almost any other marketing format available to a keepsake studio.
Here’s why it works so well for this particular business. Clients booking an elective ultrasound session are making an emotional decision. They want to see what the room looks like. They want to feel the warmth of the experience. They want to see that the images are actually good. A paragraph on a website cannot do that. A video can.
According to the Bureau of Labor Statistics, service businesses in healthcare-adjacent categories that use video marketing in local search and social media report significantly higher engagement rates than those relying on static imagery alone. That trend has only accelerated as short-form video has become the dominant content format across Instagram, TikTok, and Google.
What to Include in Your Studio Demo Reel
The best studio demo reels are not commercials. They are genuine glimpses into the experience your studio provides.
Studio Environment Shots
Show the room. Clean, warm, welcoming – the lighting, the decor, the monitor where families watch the scan together. This sets expectations and eliminates anxiety for clients who have never visited a keepsake studio. Wide establishing shots of the room, close-ups of thoughtful details.
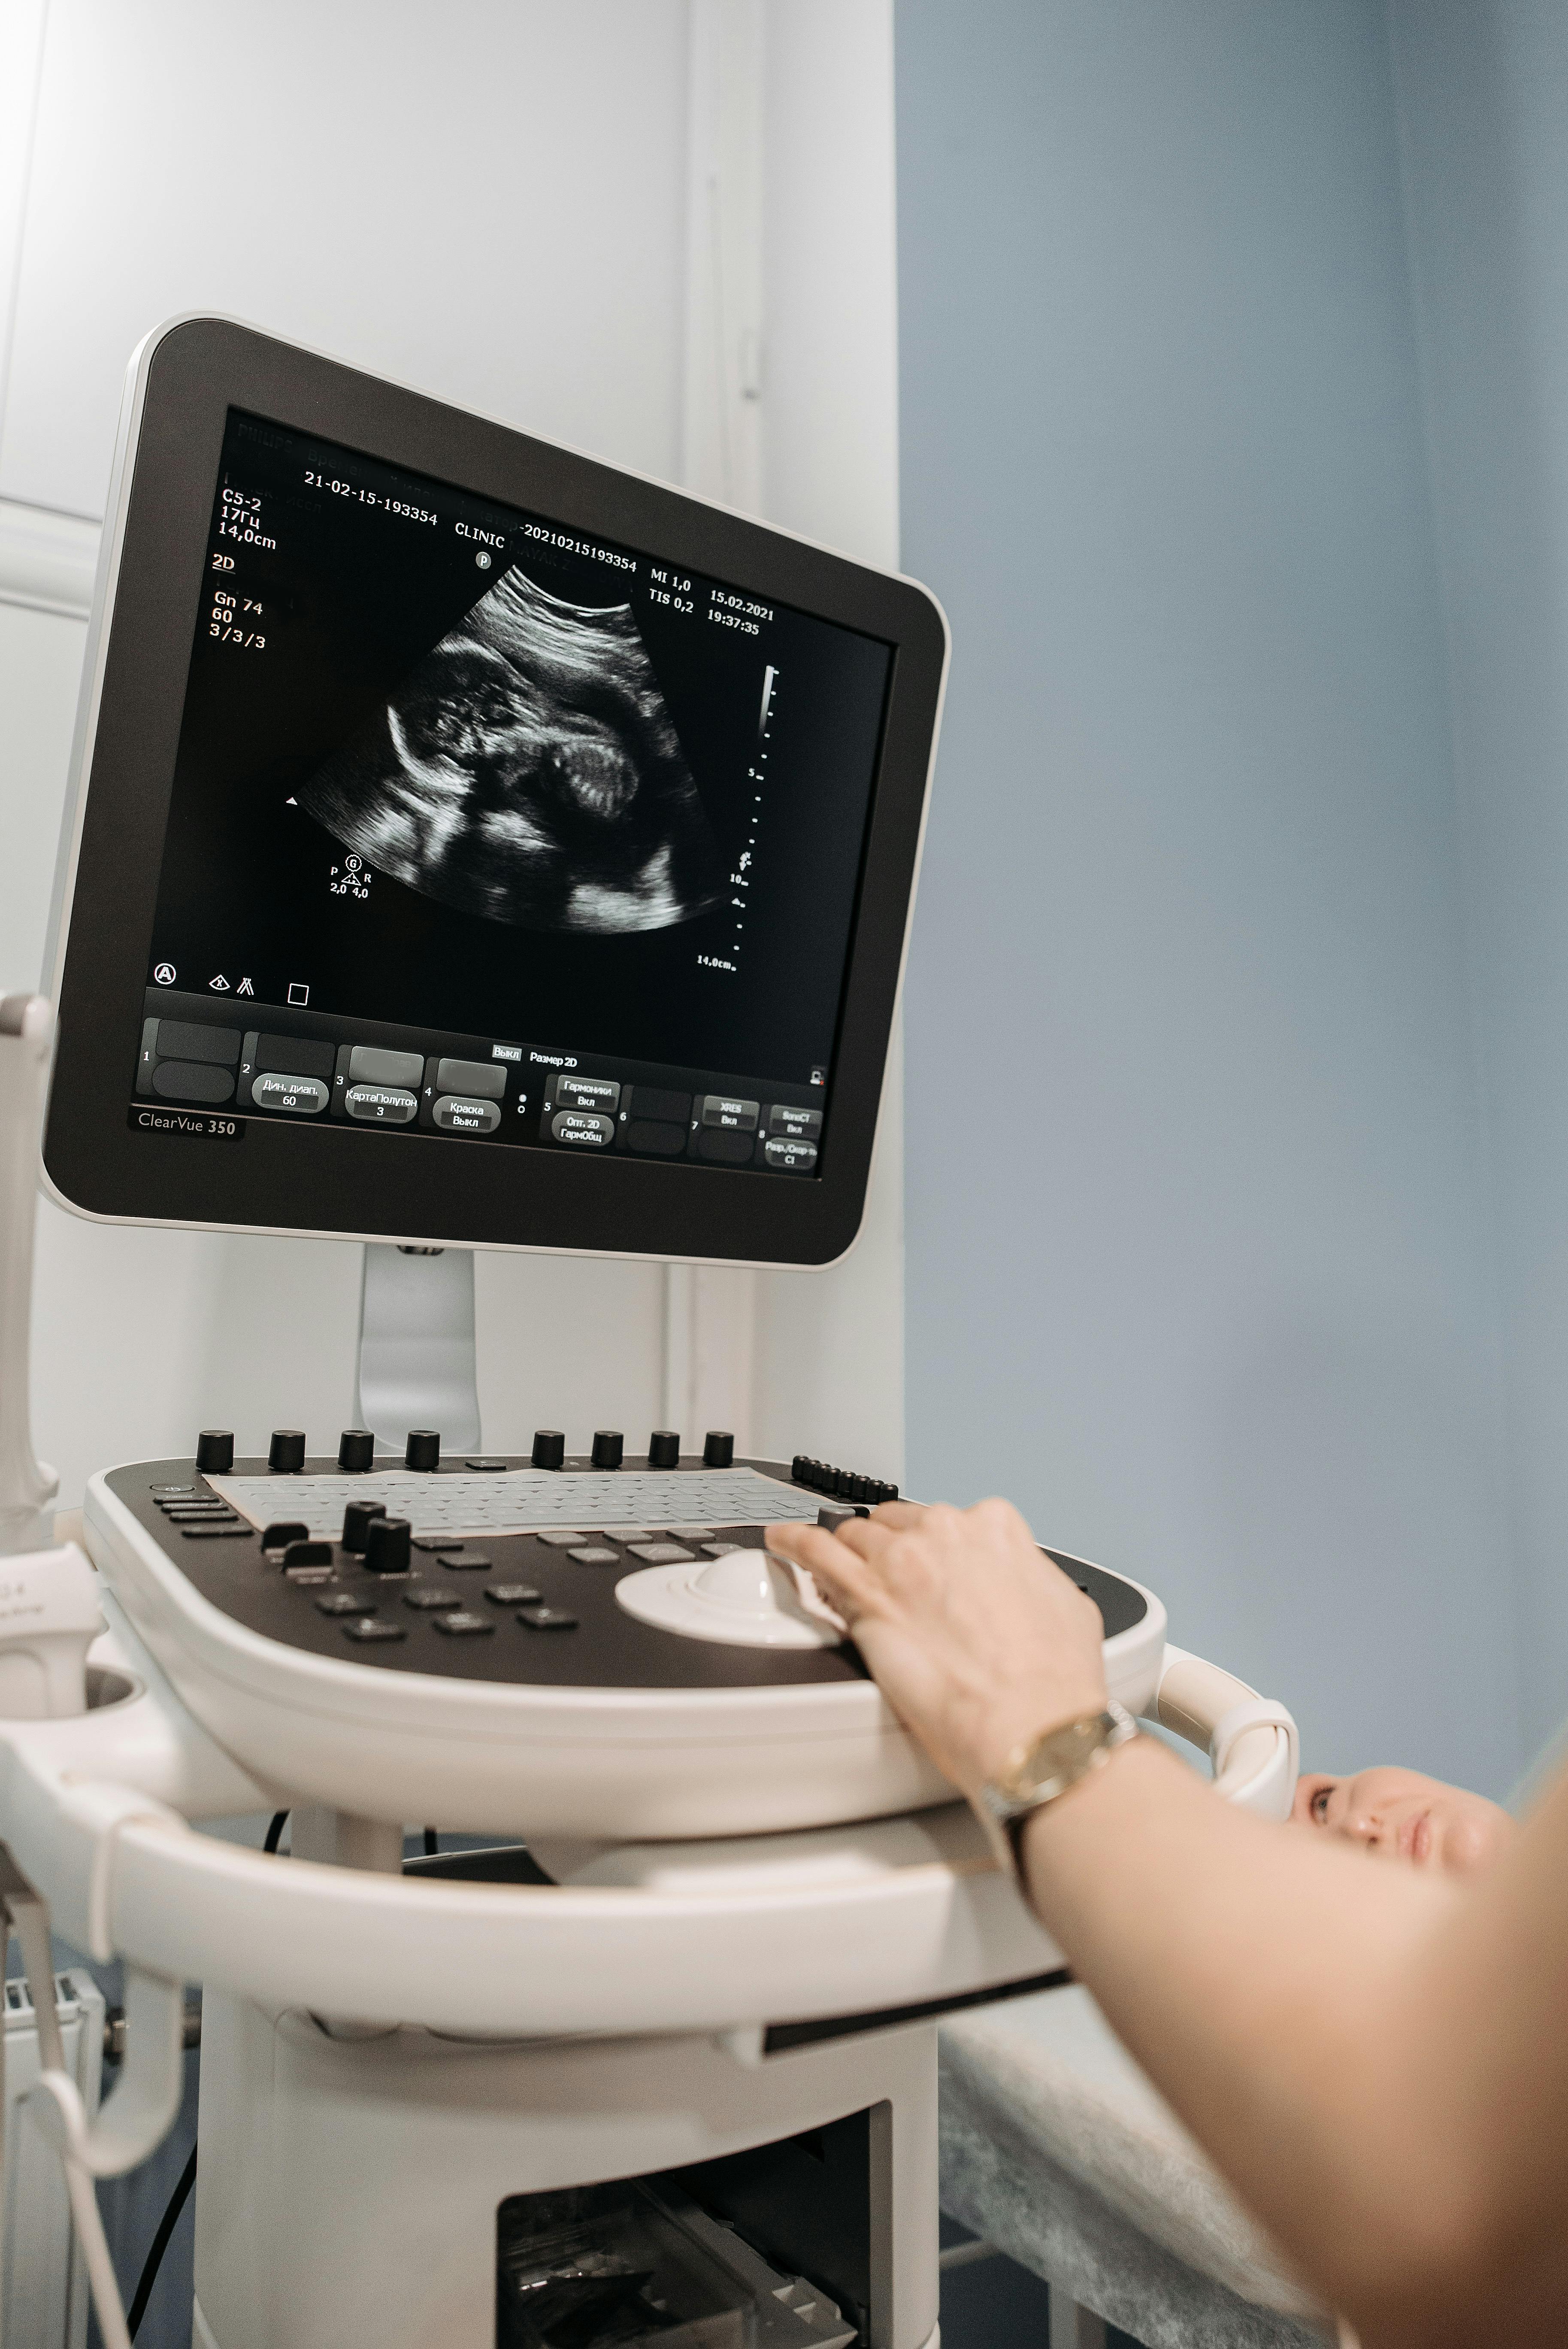
Scan Quality Footage
The monitor or TV display showing actual 3D or 4D imagery is often the most compelling footage you can capture. Clients want to see what they will see. Good image quality is your proof point. Capture it prominently and let it speak.
Genuine Emotional Moments
Reactions – when families see the face for the first time, when a sibling presses close to the monitor, when a partner reaches for someone’s hand – are what make people share your video and remember your studio. These cannot be staged effectively. They have to be real moments you captured with permission. Get client releases, and develop the habit of having a camera ready during sessions.
Your Brand Voice
Does your studio feel luxury? Warm and family-focused? Fun and celebratory? Your reel should reflect that consistently – in the music choice, the pace of the editing, the color grading. Brand consistency is what makes a reel feel professional rather than assembled.
Planning Your Demo Reel Before You Film Anything
The planning stage is where most studios waste time and money. They hire a videographer, show up, and improvise. The result is footage that does not tell a story and takes excessive editing time to salvage.
Plan a shot list before anyone brings a camera. Write down exactly what you need: establishing wide shot of the room, close-up of the screen showing imagery, scan in progress (with permission), reaction moment, studio exterior or signage if relevant. A specific shot list takes ten minutes to create and cuts shooting time in half.
Decide on your structure before you film. The most effective studio reels follow one of two formats: atmosphere-led (environment first, then scan, then reaction) or moment-led (open with an emotional moment, then pull back to show the environment that made it possible). Both work. Choose one intentionally.
DIY vs. Hiring a Videographer
Both approaches can produce great results. The question is what you have: time, equipment, or budget.
A modern smartphone with a quality gimbal stabilizer and the right lighting can produce social-media-quality footage. If you or a staff member have any video comfort at all, a DIY approach with $200 to $400 in basic equipment (gimbal, ring light, lapel microphone) can yield a perfectly usable reel. The limitation is editing skill – if the final cut needs to look polished, you either need to invest time learning basic video editing or pay someone who already knows it.
A local videographer who specializes in commercial or social media content typically charges $500 to $1,500 for a half-day shoot and basic edit. That investment produces something you can use for two to three years across every major platform. For a studio that books sessions at $100 to $250 each, a reel that generates a handful of additional bookings per month pays for itself quickly.
According to the Small Business Administration, marketing investments in professional visual content consistently rank among the highest-ROI activities for service businesses in their first two years, particularly when that content targets local search and social discovery.
Technical Basics Every Studio Owner Should Know
You do not need to become a filmmaker. But understanding a few technical basics prevents the most common demo reel mistakes.
Vertical vs. Horizontal Format
Shoot vertically (9:16 ratio) if your primary distribution will be Instagram Reels, TikTok, and mobile. Shoot horizontally (16:9) if your primary use is website embedding or YouTube. A growing number of studios shoot vertically, which gives them maximum compatibility with the highest-engagement platforms. If you are only going to produce one version, shoot vertical.
Lighting Is Everything
Keepsake studio environments often have warm, low-key ambient lighting – which is great for atmosphere but challenging for video. A simple two-point lighting setup (one key light, one fill light) dramatically improves footage quality without making the room feel clinical. Avoid overhead fluorescent lighting on camera if you can help it.
Audio
Most demo reels use music rather than dialogue, which simplifies things considerably. If you include voiceover or client audio, use a lapel mic rather than camera audio – the quality difference is dramatic and immediately apparent in playback.
Where to Distribute Your Studio Demo Reel
A finished reel should appear in multiple places:
Refreshing Your Reel Over Time
A studio reel is not a one-time production. As your studio evolves – new equipment, updated decor, seasonal services, staff additions – the reel should reflect the current experience. Plan to refresh your reel every twelve to eighteen months, or whenever something significant changes about your studio’s look or service offering.
The footage you accumulate over time also becomes an asset in its own right. Short clips pulled from longer session recordings can fuel months of social content between full reel updates.
Building a great demo reel is one component of a broader studio marketing strategy. If you are building out your studio’s full marketing approach, business training and marketing guidance from Ultrasound Trainers covers the strategies that drive consistent bookings – from video content to local SEO to referral partnerships.
Frequently Asked Questions
How long should a studio demo reel video be?
For social media distribution, sixty to ninety seconds is the sweet spot. Instagram Reels and TikTok favor content in this range for completion rate and algorithm reach. Website homepage reels can run slightly longer – up to two minutes – but shorter is almost always better. Attention is scarce. A tight sixty-second reel that keeps viewers watching is worth far more than a two-minute one that loses half its audience in the first thirty seconds.
Do I need client permission to film during sessions?
Yes, always. Build a media release form into your intake documentation. Make it opt-in, not opt-out, and be clear about exactly how the footage will be used. Many clients are happy to consent, especially when the result is content they can share. A signed release protects you legally and confirms the client’s comfort with appearing in marketing materials.
What music can I use in the reel without copyright issues?
Use royalty-free music from licensed sources. Popular libraries include Epidemic Sound, Artlist, and YouTube Audio Library. Using popular commercial music without a license will result in your video being muted or removed on most platforms. Budget roughly $15 to $50 per month for a music library subscription if you plan to produce regular video content.
Should the reel include pricing information?
Generally no. Pricing belongs on your website and booking pages, not in a reel. A demo reel’s job is to sell the experience and generate curiosity. Showing a price before someone is emotionally engaged can prematurely filter out clients who might have converted after seeing the full value. Let the reel do the emotional work, and let your website handle the pricing details.
How do I film ultrasound screen footage without glare?
Glare on ultrasound monitors is the most common technical obstacle in studio video production. Position your camera at a slight angle to the screen rather than directly perpendicular. Reduce or redirect any lights that are reflecting directly into the lens. A polarizing filter on a camera lens also significantly reduces screen glare. For a TV or external monitor, anti-glare screen protectors are a simple addition that makes filming much easier.
Get the Inside Track
Training tips, business advice, and exclusive deals delivered straight to your inbox.

What Career Changers in West Virginia Need to Know Before Opening a 4D Ultrasound Studio
Thinking about opening a 4D ultrasound studio in West Virginia as a career changer? This[...]

What Most New Elective Ultrasound Operators Get Wrong Before They Open
The most common mistakes new elective ultrasound studio owners make before opening -- from equipment[...]

How to Start an Elective Ultrasound Business in Minneapolis
Thinking about starting an elective ultrasound business in Minneapolis? This practical guide covers training, equipment,[...]

How Elective Ultrasound Studios in Wichita Build a Consistent Booking Pipeline
Marketing an elective ultrasound studio in Wichita, Kansas? This guide covers local SEO, social strategy,[...]

Elective Ultrasound Training in Hawaii: What You Need to Know Before You Enroll
Considering elective ultrasound training in Hawaii? Learn what programs cover, what the island market demands,[...]

Elective Ultrasound Training and Studio Opportunities in Washington State
Elective ultrasound training in Washington State is within reach. Explore startup opportunities, equipment needs, and[...]

On-Site Elective Ultrasound Training at Your Location: What to Expect and How to Prepare
A complete guide to on-site elective ultrasound training at your location covering curriculum, space preparation[...]

Elective Ultrasound Equipment for Minnesota Startup Studios
Building a keepsake ultrasound studio in Minnesota? This guide covers how to evaluate elective ultrasound[...]

How 3D/4D Ultrasound Technology Has Evolved: From VHS Tapes to HD Live and Beyond
Explore how 3D/4D ultrasound technology evolved from early static 3D volumes through real-time 4D, HD[...]
ARDMS, ARRT, and Non-Diagnostic Credentials: What Elective Ultrasound Studio Owners Actually Need
The ARDMS vs non-diagnostic credential elective ultrasound question confuses aspiring studio owners. This plain-language comparison[...]

Elective Ultrasound Training in France: Regulations, Market Opportunity, and Getting Started
Considering elective ultrasound training France? This guide covers the regulatory landscape, market opportunity in Paris[...]

Networking Strategies for Elective Ultrasound Studio Owners: Associations, Events, and Professional Communities
Networking as an elective ultrasound studio owner builds the peer relationships, referral channels, and operational[...]