

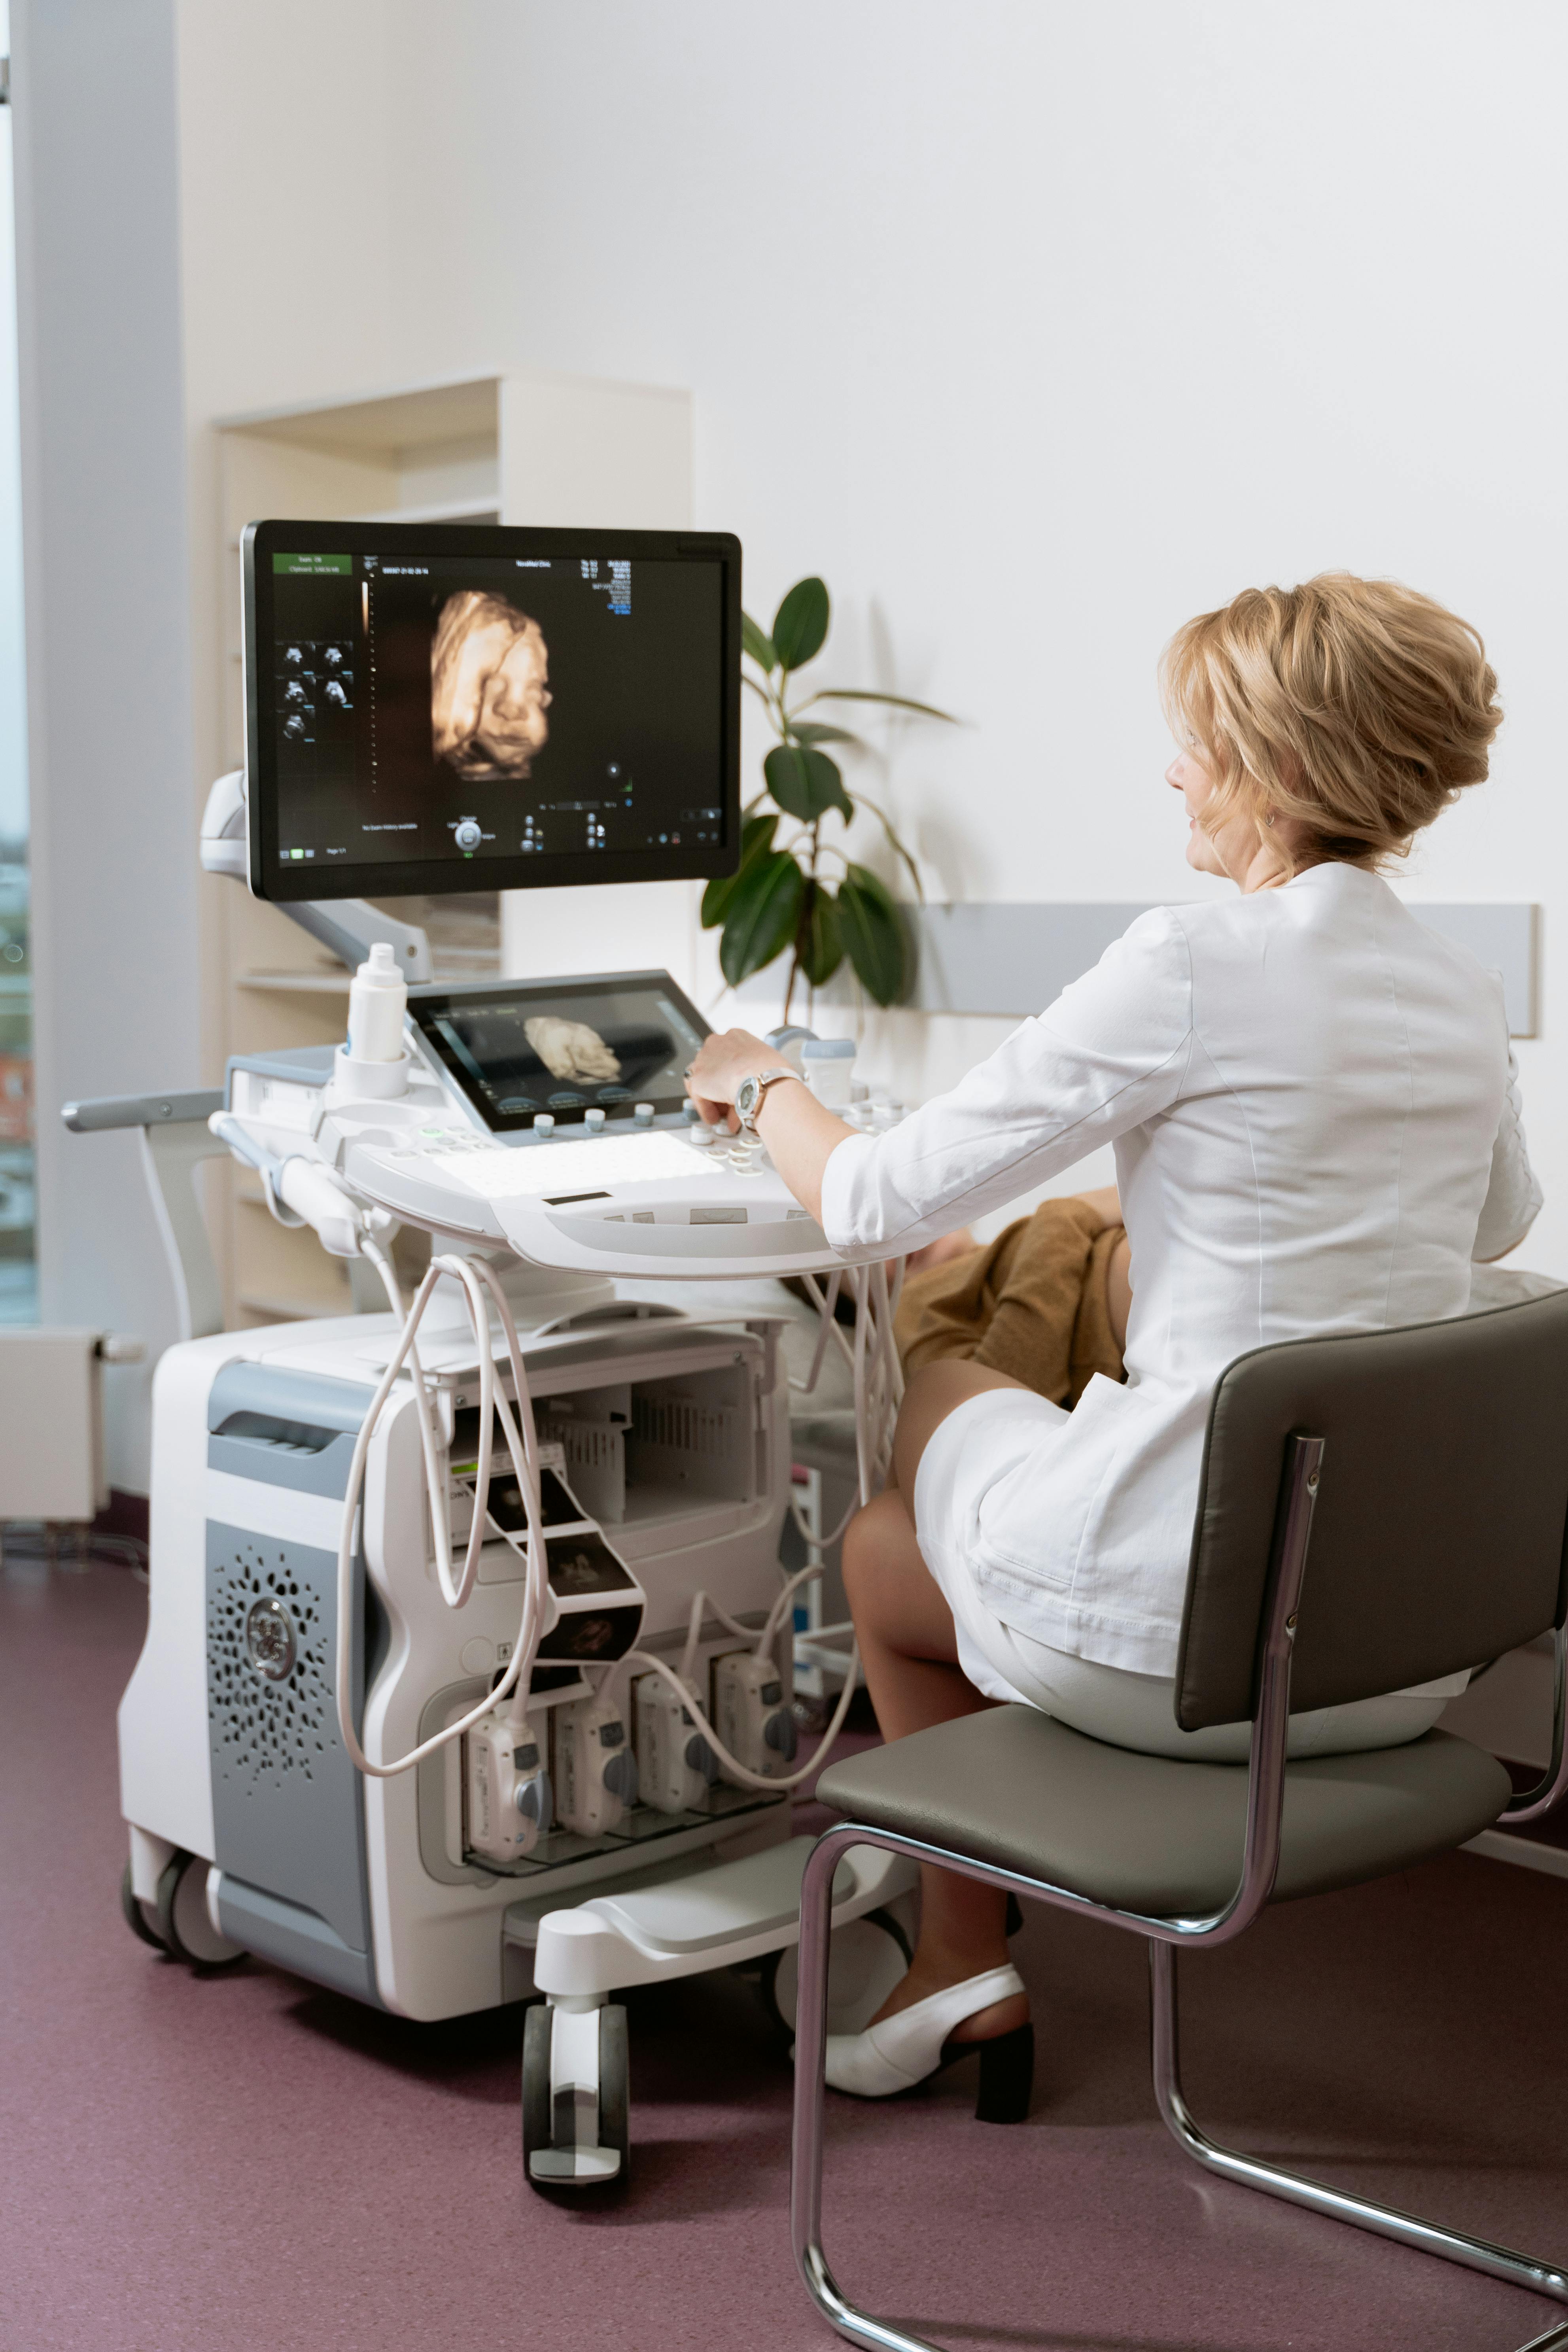
Almost every elective ultrasound operator has had a session where the images would not cooperate. The 3D volume looks grainy. The 4D rendering breaks up. The client is watching the screen and the moment you want to deliver is not landing the way it should. You are adjusting settings, repositioning the probe, trying everything you know, and still not getting there.
This post is for that moment. It covers the most common causes of poor 3D and 4D ultrasound image quality, what you can actually do about them in real time, and how to explain the situation to your client in a way that keeps the experience positive even when imaging conditions are not ideal.
Understanding What Actually Affects 3D 4D Image Quality
Troubleshooting poor 3D 4D ultrasound image quality starts with understanding that image quality in elective scanning is determined by factors you control and factors you do not. Separating these two categories clearly is the first step to both solving the problem and managing the session well when the solution is beyond your reach.
Factors you control include your probe selection, scan settings and presets, gain and frequency adjustments, your scanning angle and probe pressure, and the time you spend trying different approaches. Factors you do not fully control include the baby’s position and movement, the amount of amniotic fluid present, maternal body type, the gestational age, and the baby’s position relative to the placenta or cord. Understanding this distinction matters because it shapes both your technical approach and your client communication.
The Most Common Causes of Poor 3D 4D Ultrasound Image Quality
Baby’s Position and Face Obstruction
This is the single most common reason a 3D or 4D session does not produce strong facial images. If the baby is face-down, facing the placenta, or positioned with extremities in front of the face, no amount of technical adjustment will fix it. Your options are patience and repositioning. Ask the client to stand up and walk briefly, drink something cold or sweet if they have not recently eaten, or roll slightly to one side. Sometimes these approaches encourage a position shift. Sometimes they do not, and that is an honest reality of elective scanning you can explain without the client feeling shortchanged.
Gestational Age Outside the Optimal Window
3D and 4D imaging quality peaks during a specific gestational window, typically between 26 and 32 weeks for most clients. Earlier than 24 weeks and there is insufficient soft tissue for strong 3D rendering. Later than 33 to 34 weeks and the baby typically has less amniotic fluid around the face, less room to move, and is often in a deeply engaged position that limits imaging angles significantly. If a client books outside the optimal window, setting clear expectations before the session prevents disappointment that has nothing to do with your technique.
Low Amniotic Fluid Volume
Amniotic fluid is the acoustic window that makes clear 3D imaging possible. When fluid levels are lower than typical, either from gestational timing, maternal hydration, or normal variation, the fluid pool in front of the baby’s face is reduced and image quality suffers accordingly. Encouraging clients to hydrate well in the 24 to 48 hours before their appointment can marginally improve fluid levels, though this is not a guaranteed fix. It is a reasonable preparation tip to mention during booking confirmation.
Placenta or Cord Placement
An anterior placenta, meaning a placenta attached to the front wall of the uterus, sits between the probe and the baby. This significantly attenuates the sound waves reaching the baby and reduces the quality of 3D surface rendering. There is no technical workaround that fully compensates for an anterior placenta. You can adjust your approach angle, try imaging from the sides, and work with the windows available to you. Be honest with clients about this factor if it is visibly affecting results.
Incorrect Gain and Preset Settings
Sometimes the issue is technical rather than anatomical. If your 3D rendering shows a grainy, oversaturated, or washed-out image, your gain settings may need adjustment. In most elective ultrasound systems, 3D and 4D presets include adjustable gain, smoothing, and density parameters. A gain that is too high for the depth and body type you are scanning can degrade image quality significantly. Backing down the gain slightly and increasing smoothing often improves the rendered image quality without requiring any change in probe position.
Probe Frequency and Scan Depth Mismatch
The probe you use and the frequency setting you apply should match the body type and gestational age you are scanning. For clients where the depth to the baby is greater, a lower frequency penetrates better but at some cost to resolution. For more accessible scans, a higher frequency delivers sharper detail. If your machine offers adjustable frequency within a single probe, experiment with this parameter when image quality is lower than expected. It takes seconds and can make a noticeable difference.
A Systematic Troubleshooting Sequence
When you are in a session and image quality is not where you want it, work through this sequence rather than making random adjustments and hoping something sticks.
Determine whether the image quality issue is positional before touching any settings. Look at where the face is, whether there is fluid in front of it, and whether there are obstructions. If it is purely positional, no settings change will fix it. Try repositioning the client first.
If the position looks workable but the image is grainy or blown out, reduce gain first. Then adjust smoothing and density settings. Many image quality problems resolve with a gain adjustment alone.
Probe positioning affects the acoustic window available. Moving laterally or adjusting the angle of approach by 10 to 15 degrees can open up a fluid pocket that was not accessible from the original position.
A short walk, rolling to the opposite side, or tilting slightly can shift the baby enough to improve the view. Give this approach two to three minutes before concluding that the position is fixed for the session.
If conditions genuinely limit what you can deliver, say so clearly, warmly, and specifically. “Baby has been tucked with hands over the face for most of the session. I was able to get some good profile shots and a strong heartbeat recording, but the full face view we hoped for was not accessible today.” This kind of honest, specific acknowledgment preserves trust far better than vague apologies.
How to Communicate Imaging Challenges to Clients
How you talk about a difficult scan matters as much as your technical response to it. Clients who receive a calm, honest, specific explanation of why images were challenging leave with trust intact. Clients who receive deflection, over-apology, or silence during a struggling session leave unsure of what happened and sometimes suspicious.
Narrate as you work. Not constantly, but enough that the client understands you are actively problem-solving rather than silently struggling. A brief “I’m going to try adjusting our angle here to see if we can open up a better view” is more reassuring than long silence while you work.
If the session produces limited results despite genuine effort, offer a resolution that is specific to the cause. A complimentary return visit when the baby is in a more favorable position is a generous and appropriate gesture. Being clear that the offer exists, and why, turns a potential five-star review of a difficult session into a six-star story clients tell other people. For more on ultrasound scanning technique development, the elective ultrasound training program at Ultrasound Trainers covers image optimization as a core component of every training session. The American Institute of Ultrasound in Medicine at aium.org also publishes guidance on imaging best practices that can supplement hands-on training.
Frequently Asked Questions
Why is my 3D ultrasound image grainy or blurry?
The most common technical causes are gain settings that are too high, scanning at a depth or angle that does not have adequate fluid in front of the target, or a smoothing level that is too low for the body type. Start by adjusting gain downward and increasing smoothing before changing probe position. If the image is anatomically challenging rather than technically grainy, positional factors like anterior placenta, low fluid, or baby facing away are the likely cause.
What is the best gestational age for clear 3D 4D ultrasound images?
Most operators find the clearest 3D and 4D imaging between 26 and 32 weeks. During this window, there is sufficient soft tissue for strong surface rendering, the baby typically has adequate amniotic fluid around the face, and movement patterns often include sustained moments where the face is accessible. Before 24 weeks the tissue is less developed for 3D rendering. After 33 weeks the baby is usually larger and more engaged with less fluid and fewer accessible imaging windows.
Does an anterior placenta always cause poor image quality?
Not always, but it consistently makes imaging more challenging because the placental tissue sits between the probe and the baby, attenuating the acoustic signal. Approaching from a lateral angle rather than directly anterior can sometimes access a window that partially bypasses the placenta. Be honest with clients who have an anterior placenta about what this means for 3D imaging. It is not a failure of the session or the operator. It is an anatomical reality of their pregnancy.
How can I get better 3D images when the baby has their hands in front of their face?
Patient repositioning is the primary approach. Ask the client to walk for a few minutes, roll to the opposite side, or tilt slightly. Some operators have success with cold water or a small snack to encourage movement. Profile shots and close-up images of feet, hands, or other features can capture meaningful keepsakes even when full facial imaging is limited. Communicating that the baby is being shy is a warm and accurate way to frame the challenge while you work.
How does maternal body type affect 3D 4D ultrasound image quality?
Acoustic attenuation increases with tissue depth, which means imaging at greater depth requires more gain adjustment and can still produce lower resolution than comparable scans at shallower depths. Lowering frequency to improve penetration, adjusting gain carefully, and maximizing acoustic windows are the primary tools. Set appropriate expectations with clients who ask about image quality at the booking stage rather than waiting to address it during the session.
Should I offer a rebook when image quality is poor due to baby’s position?
It depends on the circumstance. When the limiting factor was genuinely out of the client’s control and the images fell significantly below what a typical session produces, offering a complimentary or discounted return visit is a generous and strategically sound decision. Clients who receive that kind of resolution often become the most vocal advocates for your studio. Establish a clear internal policy for when this offer applies so the decision is consistent rather than ad hoc.
What settings should I adjust first when 3D 4D image quality is low?
Start with gain. High gain is the most common technical cause of grainy or washed-out 3D images. Reduce it incrementally while watching the rendered image. Next, adjust smoothing upward to reduce surface noise. If the image has shadow artifacts from insufficient fluid in the scan area, adjust your probe angle to find a better acoustic window before making additional settings changes. This sequence, gain first then smoothing then angle, resolves most technical image quality issues efficiently.
About the Author and Process: This content was developed by the Ultrasound Trainers team based on extensive hands-on training experience and work with elective ultrasound operators across the United States. Ultrasound Trainers provides practical, experience-based training for people building and growing elective ultrasound businesses.
Last Updated: April 21, 2025
Get the Inside Track
Training tips, business advice, and exclusive deals delivered straight to your inbox.

How 3D/4D Ultrasound Technology Has Evolved: From VHS Tapes to HD Live and Beyond
Explore how 3D/4D ultrasound technology evolved from early static 3D volumes through real-time 4D, HD[...]

ARDMS, ARRT, and Non-Diagnostic Credentials: What Elective Ultrasound Studio Owners Actually Need
The ARDMS vs non-diagnostic credential elective ultrasound question confuses aspiring studio owners. This plain-language comparison[...]

Elective Ultrasound Training in France: Regulations, Market Opportunity, and Getting Started
Considering elective ultrasound training France? This guide covers the regulatory landscape, market opportunity in Paris[...]

Networking Strategies for Elective Ultrasound Studio Owners: Associations, Events, and Professional Communities
Networking as an elective ultrasound studio owner builds the peer relationships, referral channels, and operational[...]
How to Open a Keepsake Ultrasound Studio in Huntington, West Virginia
Planning to open a keepsake ultrasound studio in Huntington, West Virginia? This guide covers the[...]

Maternity Store and Baby Boutique Referral Partnerships for Elective Ultrasound Studios
A maternity store referral partnership ultrasound studio strategy connects you with local retailers sharing your[...]
Buying Ultrasound Equipment for a Maine Studio: What to Prioritize and What to Skip
Buying ultrasound equipment for a Maine studio? This guide covers service network gaps, new vs.[...]

How to Market a Keepsake Ultrasound Business in Maine: What Actually Moves the Needle
Marketing a keepsake ultrasound business in Maine requires local search, community referrals, and authentic Facebook[...]

Elective Ultrasound Training in Vermont: What Career Changers Should Understand Before Enrolling
Considering elective ultrasound training in Vermont? This Q&A guide covers what training includes, the online[...]

How to Open a 4D Ultrasound Studio in Casper, Wyoming
Planning to open a 4D ultrasound studio in Casper, Wyoming? This guide covers Casper's role[...]

Buying Elective Ultrasound Equipment for a Vermont Studio: Small State, Specific Considerations
Buying elective ultrasound equipment for a Vermont startup studio? This comparison guide covers Vermont service[...]

How to Market a Keepsake Ultrasound Business in Hawaii: What Works on the Islands
Marketing a keepsake ultrasound business in Hawaii requires a different playbook than mainland markets. This[...]