

Anatomy Landmarks Every 4D Sonographer Should Memorise
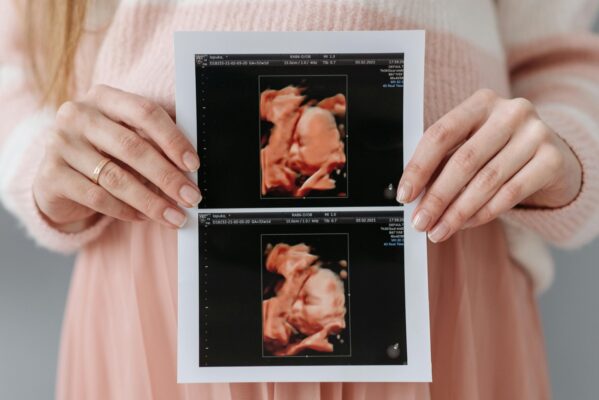
In the fast-paced world of elective ultrasound studios, knowing your fetal anatomy landmarks by heart can transform a good HDLive scan into a spectacular keepsake. But with dozens of cues—from cranial sutures to limb orientation—how do you prioritise? This guide distills the must-know landmarks, drawn from advanced modules at Ultrasound Trainers, and shows you exactly where to look and why it matters.
Why Anatomy Landmarks Matter in 4D Imaging
Have you ever started a 4D sweep only to realise mid-scan that the fetal face is tilted away? Recognising landmarks before you press “Capture” prevents wasted time and disappointed clients. Anatomy cues tell you how to angle the probe, adjust depth, and set focus zones for optimal HDLive clarity.
Beyond image quality, landmarks guide you through challenging positions. A baby curled tightly can hide key structures—knowing where to seek a landmark can turn a near-impossible scan into a triumph. That reliability builds your studio’s reputation and keeps parents coming back.
Mastery of these cues also reduces operator stress. Instead of guesswork, you follow a systematic path: locate the nasal bone, align your sweep, find the orbits, then complete the volume. This workflow becomes second nature after 3D ultrasound training sessions with Ultrasound Trainers.
Finally, consistent landmark use standardises scans across your team. Every sonographer follows the same protocol, so training new hires is faster and quality audits become straightforward. Uniform excellence elevates your elective ultrasound business.
Ready to sharpen your anatomy IQ? Let’s dive into the top landmarks you must memorise.
Cranial Landmarks: Orbits and Nasal Bone
The fetal orbits—the dark circles of the eye sockets—are among the easiest landmarks to spot. Once aligned, they centre the face in your volume and ensure symmetrical HDLive rendering. Always begin by locating both orbits in B-mode before switching to 4D sweep.
The nasal bone sits just above the upper lip and appears as a bright echogenic line. Its presence and length also matter diagnostically, but from a keepsake perspective, it anchors the mid-face and guides focus adjustments.
Pro tip: angle your probe until the nasal bone and both orbits lie in the same plane. This alignment minimises foreshortening and prevents one side of the face from appearing flatter than the other.
With practice, you’ll recall “orbits and nose” as your first two checks—no scan begins without these cranial cues in view.
Core Fetal Landmarks for Body Positioning
Once the head is properly aligned, your next task is to orient the rest of the body. Key landmarks include the spine, heart chambers, and limb positions. Each cue tells you how the fetus is curled or extended.
The fetal spine appears as a bright linear echo with vertebral bodies. When the spine is perpendicular to your probe face, it indicates a dorsally facing fetus—ideal for facial volumes. If the spine is parallel, adjust your probe angle or ask mom to shift position.
The four-chamber heart view isn’t just for diagnosis; it confirms fetal orientation. If you see two chambers on top and two below, the heart is in proper orientation. This helps decide whether to capture the thorax or shift to face mappings.
Limbs provide secondary cues. A tucked arm across the chest or a leg bent at the knee can obscure the face. Spot one elbow or knee and gently jiggle the probe to encourage the baby to move into a clearer pose.
By systematically scanning these core landmarks, you create a roadmap for every volume—no more accidental backlit glares or hidden features.
Subsection: Spine Alignment and Sweep Direction
To visualise the spine, rotate your probe until you see a bright, segmented line. If it runs horizontally across the screen, the fetus faces upward; vertical orientation means a lateral-facing baby. This orientation dictates your sweep path.
For a dorsal-facing fetus, start your sweep at the nape and move toward the chin for a seamless facial volume. If the spine is anterior, you’ll need a deeper tilt and may rely more on 5 MHz penetration for HDLive clarity.
Recording your spine orientation before each scan saves precious seconds and ensures each sweep follows a consistent trajectory across patients.
Optimising HDLive Sessions with Landmark Cues
HDLive rendering brings lifelike depth and shadows—but it also magnifies alignment errors. Landmark-based positioning is your antidote: correctly aligned orbits and nose ensure realistic surface contours and eliminate odd shadows.
Depth settings hinge on landmark distance. If the nasal bone lies 4 cm deep, set depth to 5 cm for a concise field. Too much depth throws away resolution; too little clips off features at the periphery.
Focus zones should match key landmarks. Place a focal point at the nasal bone level and another at the eye plane for dual-zone clarity. HDLive algorithms then render shadows accurately, yielding museum-quality volumes.
In the event of suboptimal lighting—when shadows look too harsh—realign to a different landmark, like the ear, and retrial a shorter sweep. These tweaks, taught in elective ultrasound training workshops, rescue otherwise flawed scans.
Mastering this interplay between anatomy cues and settings makes every HDLive session a showcase of your expertise.
Subsection: Lighting and Shadow Management
HDLive simulates a virtual light source. By locating the nasal bone and orbits, you predict where shadows will fall. Tilt your light vector to highlight cheek contours or soften under-chin shadows.
Too much contrast? Soften shadows by moving the light angle closer to the probe axis. Too flat? Increase angular offset to accentuate features. Always test adjustments on a small region before committing to a full 4D sweep.
Regularly update and share your lighting presets with your team, ensuring consistent HDLive outputs across operators and dates.
Integrating Landmark Drills into Daily Practice
Repetition cements memory. Start each shift with a five-minute phantom-scan drill: locate orbits, nasal bone, spine, and heart chambers in quick succession. Time yourself and aim to complete the sequence under 60 seconds.
Document your drill times and accuracy scores. A slight time increase signals a need for review, keeping your landmark recall sharp even on busy days.
Include these drills in your sonographer onboarding program. New hires gain confidence faster when they practice landmarks in isolation before moving to live models.
Ultrasound Trainers recommends quarterly refresher workshops—reviewing difficult landmark combos and sharing peer tips. This culture of continual improvement keeps your studio at peak performance.
Beyond team drills, challenge yourself on live patients: mentally name each landmark as you scan. Over time, you’ll notice reduced decision fatigue and smoother client experiences.
Subsection: Peer-Review and Feedback Loops
Pair up with a colleague for blind review sessions. One sonographer captures a volume, the other identifies landmarks and alignment issues. Rotate roles to sharpen both scanning and critique skills.
Maintain a shared log of common landmark errors—perhaps the nasal bone isn’t centred or the spine is off-axis. Address these in monthly team huddles with targeted mini-workshops.
Feedback loops not only improve individual skills but foster collaboration and collective ownership of quality standards.
Conclusion & Call to Action
Memorising key anatomy landmarks—crania, spine, heart, limbs—empowers you to deliver flawless HDLive experiences every time. By embedding systematic drills, leveraging landmark cues, and refining settings in elective ultrasound training sessions, your scans will stand out for clarity and consistency.
Ready to elevate your landmark mastery? Share your favourite landmark tip below, or connect with Ultrasound Trainers for customised workshops that make every scan an opportunity to impress.
Which landmark will you practice first on your next scan? Let u
Learn More About Ultrasound Training Learn More About Opening an Ultrasound Studio
Training Only vs Turnkey Ultrasound Business Package: Which Fits You?
Compare training only vs turnkey ultrasound business package options to see which path fits your[...]

How Sonographers Can Start Their Own Elective Ultrasound Studio
Sonographers have strong technical skills but often misunderstand what owning an elective studio requires. This[...]
Average Revenue of a 4D Ultrasound Business: A Complete Planning Reference
What's the average revenue of a 4D ultrasound business? This complete guide covers revenue variables,[...]

Best Portable 4D Ultrasound Machines for Elective Ultrasound Startups: What to Know
Considering a portable 4D ultrasound machine for your elective startup? This guide separates the myths[...]

Hands-On vs Online Elective Ultrasound Training: Which One Fits You?
Compare hands-on vs online elective ultrasound training for future studio owners. See what each format[...]

Why Your 3D 4D Ultrasound Images Look Blurry and How to Fix It
Struggling with blurry 3D 4D ultrasound images? This step-by-step guide covers the most common causes[...]
Who Can Legally Own an Elective Ultrasound Business? What the Rules Actually Say
The legal ownership question for elective ultrasound businesses is more open than most people assume.[...]

Starting an Elective Ultrasound Business Part-Time: A Realistic Guide
Starting an elective ultrasound business while keeping another income source is a smart approach for[...]

How to Finance an Elective Ultrasound Machine: A Step-by-Step Guide for Studio Owners
Learn exactly how to finance an elective ultrasound machine. This step-by-step guide covers loan types,[...]

Can a Med Spa Add Elective Ultrasound Services? What It Actually Takes
Med spas considering elective ultrasound as an add-on service need to understand training, equipment, compliance,[...]

Ultrasound Business Income Breakdown by Location and Pricing: What Changes Your Monthly Revenue
Ultrasound business income breakdown by location and pricing. See how market, packages, overhead, and positioning[...]

How Profitable Is a Keepsake Ultrasound Business? What Really Drives Profit
How profitable is a keepsake ultrasound business? See what affects revenue, margins, overhead, and long-term[...]