

You booked your keepsake baby ultrasound, the calendar countdown begins, and suddenly every prenatal forum you lurk seems filled with “do this” and “don’t you dare do that.” Sound familiar? Relax. Preparing for an elective session—especially one featuring jaw‑dropping HD/5D imaging—should feel exciting, not stressful. This guide breaks down the prep work into bite‑sized steps, weaving together best practices from sonographers, tips from industry leaders like Ultrasound Trainers, and real‑world stories from parents who’ve already been in your shoes. By the end, you’ll know exactly how to walk (or waddle) into the studio confident, hydrated, and camera‑ready for those unforgettable 3D/4D images.
Why Preparation Matters More Than You Think
Let’s start with the “why.” You might wonder, “Isn’t this just a fun peek?” Sure, fun is a massive part of the elective ultrasound experience, but preparation does two vital things:
- Image Quality Booster – A well‑hydrated body, an ideally positioned baby, and a calm parent all translate to crisper images. Even the most advanced 4D ultrasound machine needs good conditions to work its magic.
- Stress Reducer – Having a plan reduces last‑minute anxiety. When you know what to expect, you can focus on the joy of seeing your baby’s face instead of panicking about whether you wore the right leggings.
A 2023 survey by the American Institute of Ultrasound in Medicine (AIUM) found that clients who followed hydration guidelines were 35 % more likely to report “excellent” image quality compared with those who didn’t. That small act of sipping water days before your appointment can literally shape the memories you’ll frame on the wall.
From a studio’s perspective—in other words, from the lens of an elective ultrasound business—happy clients mean glowing reviews and repeat visits. Preparation benefits everyone.
Timing Your Appointment: Gestational Sweet Spots
When should you go? It depends on what you hope to see.
The Early Peek (14–19 Weeks)
Love surprises? Early sessions can reveal baby’s wiggles and profile but may lack the plump cheeks people associate with 3D/4D keepsake ultrasounds. Parents often schedule early just for gender reveals, then book a second visit in the “sweet spot.”
The Sweet Spot (26–32 Weeks)
Most studios, including those run by Ultrasound Trainers’ graduates, recommend this window. Baby has developed enough fat to show facial features but still has amniotic fluid to act as a clear “photo filter.”
The Last‑Minute Dash (33–36 Weeks)
If you waited, don’t fret. Many techs capture stunning images late in pregnancy; just know space gets tight, so positioning tricks (we’ll cover those later) become crucial.
Pro tip: Book your appointment about 2–3 weeks in advance—popular studios fill up quickly, especially for weekend slots.
Hydration & Nutritional Prep: Fueling Picture‑Perfect Fluid Levels
The Hydration Timeline
Think of amniotic fluid as the “lighting director” for your ultrasound photo shoot. Clear fluid = clear images. Here’s a simple hydration plan:
- 72 hours before: Aim for half your body weight in ounces of water daily (e.g., 150 lbs → 75 oz).
- 24 hours before: Sip steadily; avoid salty foods that encourage water retention outside the amniotic sac.
- 2 hours before: Drink an additional 16–20 oz and empty your bladder as needed—you don’t need a painfully full bladder for most 3D/4D scans.
“Parents who follow a three‑day hydration schedule often get butter‑smooth images even on older machines,” notes Amanda R., RDMS, who trains sonographers through elective ultrasound training programs.
Snack Smart
A light, healthy snack 30 minutes before your session can gently wake baby. Think fruit with protein (banana & almond butter) or yogurt and granola. Skip sugary sodas that spike and crash energy.
Caution with Caffeine
Yes, some studios suggest a sugary drink if baby is shy, but ask your technician first. Too much caffeine can make baby flip away from the probe, giving you a blurry acrobat instead of the serene yawn you hoped for.
Choosing Clothing & Comfort Essentials
You’re not walking a runway, but you’re starring in your baby’s first photoshoot. Dress for comfort and camera:
- Two‑piece outfit: A stretchy top and yoga pants make it easy to expose your belly without feeling overexposed.
- Soft colors: Pastels or neutrals photograph better than busy prints if you’re getting photos with your belly out.
- Skip jewelry lotions: Glittery lotions and dangling belly rings reflect sound waves and can create artifacts.
Remember to bring socks or slippers; studios often keep rooms cool for sensitive equipment like the Samsung HERA W10. Cold toes distract from the moment faster than you’d think.
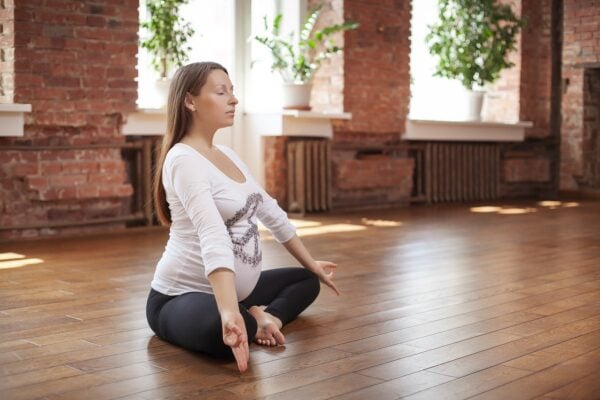
Mindset & Expectations: Keeping It Realistic (and Magical)
Scrolling social media, you’ll see miracle shots—baby smiling, thumb in mouth, crystal‑clear profile. Incredible, yes, but remember those are the greatest hits, not the whole recording.
Set realistic expectations. Babies sometimes hide. Umbilical cords can photobomb. Even top‑tier machines like the GE Voluson E10 can’t persuade a placenta‑hugging baby to turn. That’s okay! Your tech will try gentle bouncing, maternal position changes, or even have you sip juice to spur movement.
One mom, Daniella, tells how her son “face‑planted the placenta like it was a pillow.” After a few sideways lunges and laughing at gravity, they captured the perfect shot: tiny lips pursed in a sleep grin. Preparation + patience turned potential disappointment into a joyful memory.
If nerves spike, breathe deeply. Remember: this isn’t a diagnostic anatomy scan. It’s a celebration. Studios design sessions with music, large screens, even live‑streaming to grandparents worldwide.
Day‑of Checklist: What to Bring & What to Leave Home
Must‑Have Items
- Valid photo ID (many studios require it for paperwork).
- Referral note if your OB requires approval for elective ultrasounds.
- Bottle of water to maintain fluid levels.
- Support squad – partner, friend, or kids (check the studio’s guest limit).
- Payment method – confirm if your studio charges extra for heartbeat animals or USB drives.
Nice‑to‑Have Extras
- Full‑zip hoodie for quick temperature regulation.
- Favorite playlist on your phone—some studios let you connect via Bluetooth.
- Treat for afterward—brunch reservations or cupcakes turn the appointment into a mini celebration.
Leave These at Home
- Strong perfumes—equipment rooms need neutral air quality.
- Children under 3 if they can’t sit still; consider child‑care so you can focus.
- High expectations of perfection—bring curiosity instead.
After the Session: Maximizing Your Keepsakes
Once you’re floating out with printed photos, digital files, or a heartbeat teddy, keep momentum going:
- Create backups—Save digital images on cloud storage and a USB. Studios usually keep files for 30 days, not forever.
- Share responsibly—Tag your studio on social media; glowing testimonials help independent businesses more than you know.
- Schedule follow‑ups—Thinking of a HDLive™ session later? Many studios offer package pricing when you book multiple visits.
If you run your own 3D/4D ultrasound business, consider how post‑session engagement—email photo delivery, discount codes for re‑visits—boosts both revenue and client loyalty.
Frequently Asked Questions (FAQ)
Does an elective ultrasound replace my medical scans?
No. Elective ultrasounds are non‑diagnostic. They don’t check for anomalies. Always attend your routine medical ultrasounds recommended by your healthcare provider. For medical guidelines, see the American College of Obstetricians and Gynecologists.
Is it safe to have multiple elective ultrasounds?
Current research indicates that diagnostic‑level ultrasound is safe when performed by trained professionals. Elective studios typically use settings well below FDA maximum output. Still, follow ALARA (As Low As Reasonably Achievable) principles—book only sessions you truly want.
Can I bring family to the appointment?
Most studios welcome 4–10 guests, but capacity depends on room size and local regulations. Always confirm limits, especially if you envision grandparents crying happy tears beside you.
Do I need a full bladder?
For 3D/4D sessions, usually not. A comfortably empty bladder lets you relax. If you’re under 14 weeks, studios may advise partial filling to prop up the uterus.
What if baby is uncooperative?
Many studios offer a free re‑scan within a week if they can’t capture usable images. Ask about their policy when you book.
Key Takeaways
- Start hydrating three days in advance; clear amniotic fluid equals clear images.
- Schedule your session between 26–32 weeks for plump cheeks and plenty of wiggle room.
- Wear a comfy two‑piece outfit and bring water, ID, and your support crew.
- Keep expectations realistic—every baby poses differently. Preparation + patience = magic.
- Back up your photos immediately and share a review to support your local studio.
Ready to capture those unforgettable first portraits? Whether you’re a parent booking your session or a studio owner sharpening client prep with these tips, a little planning yields lifelong keepsakes.
Are you planning your own 3D/4D ultrasound visit? Share your excitement or questions in the comments below! If you found this guide helpful, inspire other parents by sharing it on social media.
Learn More About Ultrasound Training Learn More About Opening an Ultrasound Studio
How 3D/4D Ultrasound Technology Has Evolved: From VHS Tapes to HD Live and Beyond
Explore how 3D/4D ultrasound technology evolved from early static 3D volumes through real-time 4D, HD[...]
ARDMS, ARRT, and Non-Diagnostic Credentials: What Elective Ultrasound Studio Owners Actually Need
The ARDMS vs non-diagnostic credential elective ultrasound question confuses aspiring studio owners. This plain-language comparison[...]

Elective Ultrasound Training in France: Regulations, Market Opportunity, and Getting Started
Considering elective ultrasound training France? This guide covers the regulatory landscape, market opportunity in Paris[...]

Networking Strategies for Elective Ultrasound Studio Owners: Associations, Events, and Professional Communities
Networking as an elective ultrasound studio owner builds the peer relationships, referral channels, and operational[...]
How to Open a Keepsake Ultrasound Studio in Huntington, West Virginia
Planning to open a keepsake ultrasound studio in Huntington, West Virginia? This guide covers the[...]

Maternity Store and Baby Boutique Referral Partnerships for Elective Ultrasound Studios
A maternity store referral partnership ultrasound studio strategy connects you with local retailers sharing your[...]
Buying Ultrasound Equipment for a Maine Studio: What to Prioritize and What to Skip
Buying ultrasound equipment for a Maine studio? This guide covers service network gaps, new vs.[...]

How to Market a Keepsake Ultrasound Business in Maine: What Actually Moves the Needle
Marketing a keepsake ultrasound business in Maine requires local search, community referrals, and authentic Facebook[...]

Elective Ultrasound Training in Vermont: What Career Changers Should Understand Before Enrolling
Considering elective ultrasound training in Vermont? This Q&A guide covers what training includes, the online[...]

How to Open a 4D Ultrasound Studio in Casper, Wyoming
Planning to open a 4D ultrasound studio in Casper, Wyoming? This guide covers Casper's role[...]

Buying Elective Ultrasound Equipment for a Vermont Studio: Small State, Specific Considerations
Buying elective ultrasound equipment for a Vermont startup studio? This comparison guide covers Vermont service[...]

How to Market a Keepsake Ultrasound Business in Hawaii: What Works on the Islands
Marketing a keepsake ultrasound business in Hawaii requires a different playbook than mainland markets. This[...]