Elective 4D Ultrasound Training: From Beginner to Confident Studio Pro
Elective ultrasound training has evolved from ad-hoc lessons to rigorous, competency-based programs that prepare you for real clients, real schedules, and real expectations. If you’re drawn to the magic of keepsake baby ultrasound and want to offer cinematic, lifelike views with 4D ultrasound training, this guide gives you the exact skills map: fundamentals, scanning sequences, machine presets, client communication, and business-ready workflows.
Why 4D Skills Matter in an Elective Studio
In the elective space, you’re not diagnosing; you’re crafting an experience. Yet, the technical bar is high. Parents expect smooth face shots, adorable yawns, and that perfect profile—even when baby is shy. That means mastering probe control, fetal positioning strategies, and image optimization. Learning elective 4D ultrasound is about turning variables into repeatable workflows, not crossing fingers for a cooperative fetus.
From a business perspective, strong technical execution creates predictable session lengths, higher keep rates on media packages, and less need for re-scans. That’s the backbone of a profitable 3D/4D ultrasound business.
Elective vs. Diagnostic: What Changes (and What Can’t)
Elective scans emphasize bonding and memories, but safety and professionalism are non-negotiables. Keep output within prudent exposure, optimize Mechanical/Thermal Index, and respect scope boundaries. Pair your practical training with safety resources like the AIUM’s keepsake guidance and ALARA principles, and make it part of your studio onboarding.
- Safety baseline: ALARA, prudent use of Doppler in non-medical sessions, and guest comfort.
- Experience focus: lighting, seating, display size, and session flow.
- Scope clarity: you do not diagnose—always refer to prenatal care providers for medical questions.
The Five-Stage Roadmap to 4D Ultrasound Mastery
This training framework is built around progressive, hands-on competencies. Use it for self-study or as a structure when choosing ultrasound business training programs.
Stage 1: Console Literacy & Preset Fundamentals
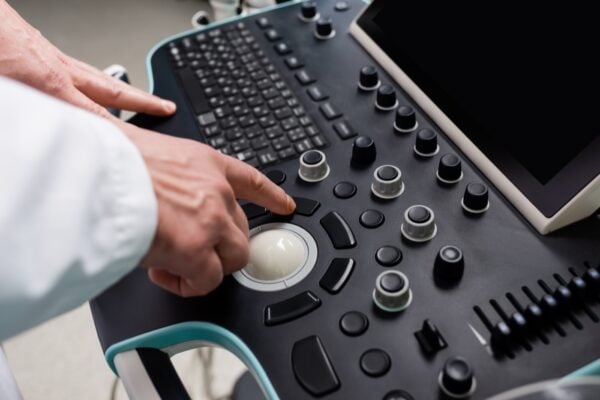
Start with the anatomy of your console. Learn the relationship between frequency, depth, focus, and gain. Create a “baseline 2D preset” that becomes your launch pad for 3D/4D.
- 2D Base: Depth to include head/torso; dynamic range moderate; focus at area of interest; overall gain conservative to preserve contrast.
- 3D/4D Base: Volume angle 35–60°, acquisition speed medium, surface rendering on, speckle reduction moderate.
- Button familiarity: Cineloop, volume acquire, rotate/tilt, render opacity, threshold, and ambient lighting.
Training tip: keep a preset log. Each time you tweak a setting for a tough scan, document it. Your log becomes a custom guide that shortens every future session.
Stage 2: Positional Strategy & Fetal Behavior
The difference between a “meh” image and a wow-shot often comes down to fetal position and fluid window. Master the “rules of access”: face up vs. down, anterior vs. posterior placenta, and cord placement.
- Warm-up 2D sweep: Survey fetal position, estimate fluid windows, identify placenta, cord proximity to face.
- Maternal repositioning: Side-lying, gentle hip tilt, brief standing, or hydration break to shift baby.
- Face-first workflow: Capture 2D profile → switch to volume → acquire 2–3 volumes → render → refine surface and light.
Stage 3: Volume Acquisition & Rendering Artistry
In 4D ultrasound training, volume acquisition is your “shutter speed.” Learn to size the region of interest (ROI) tightly around the face to increase detail and reduce motion artifacts.
- Use a medium acquisition speed for a balance of quality and motion tolerance.
- Keep the fetal face at center depth; avoid clipping chin or forehead.
- Start with soft surface rendering, then increment threshold until facial structures pop without waxy artifacts.
Pro move: after the first good volume, switch to a slightly different angle to avoid placental shadow or cord overlay—give parents variety in their gallery.
Stage 4: Live 4D Session Flow
Live 4D is where excitement peaks, but it requires composure. Narrate gently, celebrate movements, and avoid chasing every motion. Build a pattern: capture → show → save. Parents appreciate clarity over chaos.
- Open with 2D heartbeat visualization (within safety guidance), then transition to face, hands, and feet.
- Use a “3-take” rule: three solid attempts at face; if cord/placenta blocks view, shift to profile/hands, then return to face later.
- Save a short 4D cine of a yawn or stretch for premium packages.
Stage 5: Quality Assurance & Repeatability
Implement a simple QA checklist so every session meets your standard:
- Preset check: correct probe, depth, focus, and rendering profile.
- Media check: 6–10 final stills plus 2 short 4D clips for mid packages; more for premium.
- Client check: verify spelling on labels, media delivery method, and permissions for social sharing.
Tools, Tech, and the Right 4D Ultrasound Machine
Hardware matters, but technique matters more. That said, a modern 4D ultrasound machine with responsive rendering and stable frame rates will improve your keepers. Look for quick boot, customizable presets, ergonomic probe, and easy media export. If you plan to buy an elective ultrasound machine, test on volunteers to evaluate image sharpness and handling.
Training best practice: maintain two presets—one for anterior placenta, one for posterior—with different render thresholds and light angles.
Client Experience That Sells Itself
Most parents will never notice your dynamic range, but they will remember how you guided them through the session. Simple scripts reduce anxiety and establish trust:
“We’ll begin with a quick 2D look to see where baby is. Then I’ll switch to 3D and finally 4D for some live motions. If baby is a little camera-shy, we’ll try a couple positions.”
- Lighting: dim but safe; avoid screen glare.
- Seating: partner and sibling view; sightline to big display.
- Sound: gentle music; your voice should lead.
Practice Drills for Faster Progress
10-Minute Face Drill
Set a timer. Warm-up in 2D, snapshot profile, acquire one clean volume, render, and export 2 stills + 1 short clip. Evaluate: Was ROI tight? Did the threshold preserve detail without plastic sheen?
Placenta & Cord Problem-Solvers
- Anterior placenta: angle under the cheek; increase light from opposite side.
- Cord overlay: change tilt, re-acquire with a smaller ROI to avoid cord.
- Low fluid day: shift goals—hands/feet close-ups can still delight.
Training Formats: What to Choose
You’ll find options ranging from weekend intensives to mentored apprenticeships. Blended models work best: online foundations + on-site live scanning with structured feedback. Ask providers to show a skills rubric, supervised scan count, and post-training support.
Many studios rely on expert partners like Ultrasound Trainers for structured elective ultrasound training, preset building, and business setup—especially helpful if you’re also planning an ultrasound franchise or multi-location rollout.
Marketing Your New 4D Skills
Once your technique is consistent, shift attention to demand. Test these ultrasound business marketing tips:
- Create “confidence reels”—short before/after render transformations.
- Offer weekday “mini face sessions” to fill off-peak hours.
- Bundle a “try-again” policy with limits to protect schedule capacity.
FAQ: Elective 4D Ultrasound Training
How long until I’m confident? With focused practice (5–10 supervised scans/week), most trainees achieve consistent results in 6–8 weeks.
Do I need medical credentials? Requirements vary by state/country and your studio model. Clarify local regulations and scope, and keep safety training on file.
What if my machine is older? You can still produce excellent images with refined presets and tight ROI. Consider upgrading when live 4D frame rates or exports bottleneck sessions.
Where can I learn more? Check AIUM safety statements and vendor manuals. For business-ready training and setup, explore providers like Ultrasound Trainers.
Are you planning to start your own 3D ultrasound business? Share your thoughts and challenges in the comments below! If you found this guide useful, help others by sharing it on social media.


